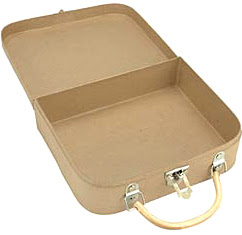
This actually is free standing, but photoed so much better laying flat to see the details. I have it joined together in the back with wide burlap ribbon, with just a little space between, to give it room to fold the sides in a wee bit, so it stands up! Here are the close ups and what I did..

Here is what I did to create this both outside pieces of the project. This is Nika, one of Maggi's adorable Spoo's and Chena her other Spoo is on the opposite side! They are so Beautiful I couldn't resist using them!! LOL
I took the canvas banner and cut it to fit the black chipboard pieces. Note: the canvas shrinks so cut it a little bit bigger than the project if your gonna give this a whirl!! Then I used the Creative Medium that we got in last month's kit and did a photo transfer to the canvas piece. I used a ink jet printer and regular copy paper and printed out my photo in the size that I needed.. I did both of these 5x7 with the adj to fit turned off. I then cut it to fit the canvas where I wanted it to go.. Note: I didn't attach it yet to the black chippy square.
I traced around it with the pencil that comes with the kit and then used the fan brush to apply the medium to my canvas. I only put the medium in the outlined area that I created with my pencil. I made sure it was coated well and then laid my photo over it. Using my outlined pencil mark as guides. Then I used a rubber brayer to flatten it well. Next I started peeling the photo right off.. If you are using this medium it dries really quick so it doesn't need to set for any length of time. Be gentle and peel really slow!! I started at the corners and peeled back.
After it was all peeled off, I used the Mr Huey's mist in "clay grey" that came in the kit to soak the remaining areas. then gently rubbed the remaining off. I saturated the whole piece with this mist! So be sure to cover it really well! After I had as much as possible removed, I dried it. When it was really dry I used the chalk and pencil that was in the kit and highlighted the photo in areas to make it pop! When doing the transfer some of the detail didn't shine as much as I wanted it too. So them chalks that came in the kit was really wonderful for the highlights!! Now after I did this I covered the outside of the photo with the Stephanie Barnard "Artichoke" that came in the kit as well. I did this to get the whole image to blend really nice and a some color. I then tweaked it a little more with the chalks after it was dry.
Then I used the mask that came in the kit and some molding paste. Took out some Lindy's and painted on the color to the molding paste areas. I used "Afternoon Delight Denium", then covered it in some Lumiere Metallic gold. Then attached my piece after it was dry to my black chipboard that came in the kit.
The big Letter "N" that came in the kit (whole bunch of yummy Maya Road letters!) was covered with Stampendous Embossing Enamel in "Aged Copper". I covered the Yummy Metal flower Flying Unicorn Adornment in it as well!! Love this stuff!!!!!! Oh and the flower Adornment is in this kit too!!! This kit is loaded with yumminess!!! I covered one of the Petaloo vines in the same Lindy's mist that I used on the masked area. Then twined it together with the other piece. The vines are in the kit as well! :) The DA chippy from my stash, was covered in the "Aged Ivory" embossing enamel. Then I attached a lace trim to the bottom, also from my stash. The little Offray flower center is from my stash as well. I attached them all to my main piece. Time for the next piece! Sorry the next ones won't be as long! LOL

Note: Lots on this piece is from my stash, but most can be found in the Flying Unicorn store!! Here is what I used.
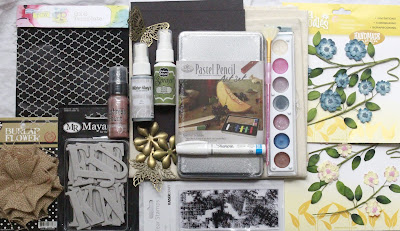
From the kit:
Petaloo vines, Flower Flying Unicorn Adornment, Base piece (black chipboard).
From My stash:
DA Chippies, Bricks and corners.
Lindy's mist: Coco Bean Copper
Flying Unicorn Metal Adornments: Key
Offray: Off white flower
Viva Pearl Pen: Copper
Prima: Dark Rust Edger, Flower (rusty orangish one), Junk yard findings light bulb, Doors, Letters, PP BG is Engraver,
Pink Paislee: Hope chest collection (rooster and Behind the flowers BG).
Stampendous embossing Enamel: Aged Ivory
Last close up:

The treatment to this panel was the same as the first. So much fun! Hope you give it a try and got one of these amazing kits!!!
Now for my partner Maggi and her stunning projects!!!!! Seriously WOW guys!
The Flying Unicorn Mixed Media Inspiration will be released each month on the 15th. Its purpose is to provide you with a collection of products that will stimulate your imagination, provoke your inner muse, and inspire you to create! Originally I set out to make a canvas mini but after creating a couple pages I decided I liked them better a little pieces of art.
This was done with one of the black 6 x 6 chipboards that came in the kit.

Here are my steps for creating this:
1. Mask the upper portion of the chipboard with Studio 490 gold embossing paste using the TCW mini quartrefoil mask that came in the kit. Let that dry thoroughly.
2. While that is drying cut a 5" circle from the center of a 6 x 6 piece of paper. I used a sheet from Prima's Nature Garden.
3. Make a flower using McGill's Floriano punch - punch two flowers, mist them and give each petal a twist, then dry. Cut a couple retro flowers for the center and give them a twist and mist. Cut a starburst. Put the two large flowers on the bottom offsetting the petals, then the retro flowers, then the starburst. Add some stickles around the edges and on the flower stamens.
4. Tear of some Lindy's fusible webbing and stamp with whatever colors you like and then add colors of embossing powder. Use your heat gun to melt the embossing powder and watch the webbing turn to a lacey web.
5. The lovely frame in the background is one that Alda made for me, I used antique gold Rub 'n Buff to color it. The cherub is a Prima Ingvild Bohme resin.
6. By now the embossing paste should be dry, so back to the chippy. One odd thing about the black boards is that they "bleed" a pink color so I could not get a white cloud with white paint or gesso so I ended up using Stampendous chunky white embossing powder to make my cloud. Actually I love the effect of the embossing powder anyway so it worked out quite well!
7. Next I just layered all the pieces on beginning first with the fusible webbing placing it so that it would peek out from the circle frame. Then I added the rectangle frame and the popped up the cherub. Then I added the two Flying Unicorn metal flowers ( used Rub 'n Buff to make them gold) and the large handmade flower and two leaves.
8. I used the cream metallic rubon that came in the kit around the edges of the circle frame and I used some gold cream metallic rubon from my stash, same as in the kit, just different colors. I used foam squares on the circle frame to pop it up so that the piece has lots of depth.
9. And that's all there is to it!

Closeup of Lindy's fusible webbing

Floriano flower
I can't wait to see where your muse takes you with the inspiration packed in this collection of goodies! ~~Maggi
Isn't Maggi's pieces so stunning?!! WOW Girl Ya really ROCKED it out! Hope you guys got some inspo to make your own projects! Hey and don't forget we got a challenge this month all about mixed media at the forums!
Have a great day all!!!
Isn't Maggi's pieces so stunning?!! WOW Girl Ya really ROCKED it out! Hope you guys got some inspo to make your own projects! Hey and don't forget we got a challenge this month all about mixed media at the forums!
Have a great day all!!!