Sunday, August 30, 2015

Flying Unicorn Your Passion Your Art Sept KOM


http://www.flyingunicornstore.com
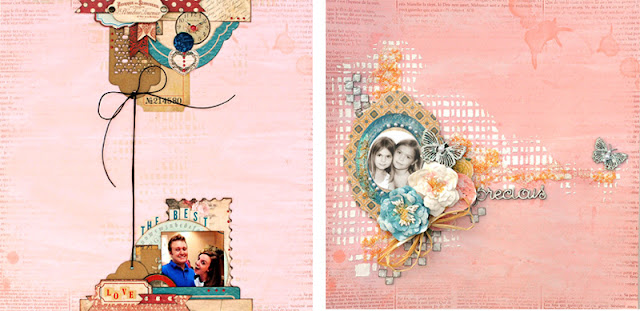
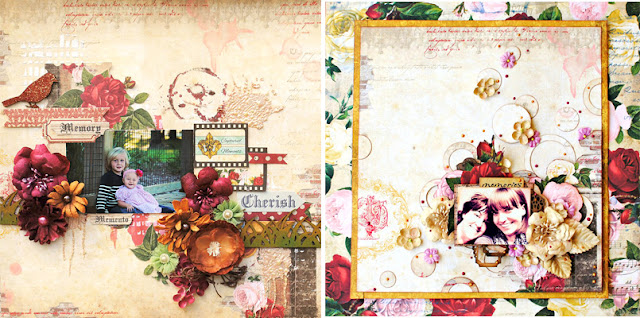
Flying Unicorn transitions to Autumn - the time of year when all the goodness of Summer and Autumn come together for a prefect blend. Sept's "Your Passion Your Art" captures the essence of the fading Summer and the welcoming richness of a new season. Without further adieu we offer you our September - Your Passion. Your Art kit of the Month




http://www.flyingunicornstore.com/category_s/1522.htm
September is the month where folks grab the last whispers of Summer. It's a time to prepare for the changing season. Included in each Main Kit, is always a fun and unique "off the Page " item. We have the perfect "Off the Page" piece to help celebrate a symbol this change.


http://www.flyingunicornstore.com


From the beginner to the avid mixed media artist our Mixed Art add on kit will surely please you. Our Mixed Art kit will always come with a canvas and mixed media art supplies to advance your skills as an artist.


http://www.flyingunicornstore.com/category_s/1522.htm
Flowers, vines,and embellishments oh my! Our Mixed Passion is a collection of everything pretty to add to the Main kit or the add on kits. The colors and embellishments will enhance your Kit of the Month creations or it can stand alone and you can create something magical on its own! So turn up the music, make some tea and lock your self away while you create some art!


http://www.flyingunicornstore.com
Our Small Art Big Passion is all about the love of making cards, tags atc's and anything in between. From Stamps, flowers, paper, embellishments and pretty things in between! These yummy goodies will enhance any of the kits or stand alone .


http://www.flyingunicornstore.com


We are thrilled to present great free tutorials, techniques, videos and Build a Page using our Kit of the Month to help you grow in the passion of your art. So stay tuned there is so much more to come in the next week!


Special Memories with CE

Hello all! Here today to share a LO with you using CE chippies. Love how chippies can add depth to a project. By using them in your layers it helps with dimension of those layers. Here is my LO.


By incorporating them in my cluster, added the depth I was looking for. Easy as pie to color! Just inkers in the selected colors of brown and green for the branch and Gesso and a brown inker for the shading on the birds. I used the Birds chippies and Branch Set of 3. Thrilled to see them in Sept KOM at Flying Unicorn!  Here are a couple of close ups!


Special memory of me and my wonderful husband! Love this man to bits!! The chippies mixed in with the cluster also helps the added framing of the photo. Without them the clusters would be a little on the boring side!


Chippies also are the perfect pair for media layers too! Gives a little more umph to those splats and molding paste areas.

CE Products Used:

Branch Set of 3

Birds

Other Products Used:

Flying Unicorn KOM Sept Featuring Bo Bunny

Thank you all for joining me today!!


Thursday, August 27, 2015

Playdate Thursday at Flying Unicorn!

Hi all! Welcome to Playdate Thursday at Flying Unicorn!

Tammy here today to share with you how I use my Faber Castell watercolor pencils to color my stamps. Today I am using my most fave stamps, the Tim Holtz " Crazy Birds" stamp set! These will be back in the Flying Unicorn store Really soon so stay tuned if you haven't got your hands on a set yet. Lets get this show on the road!


1st. I stamped my image on some watercolor paper. This holds up really well with the water you will have to apply. 


Now I am gonna show you 2 ways you can color these.. I have used both by themselves and it works just fine. But you can use them together. 

2nd. Grab a old lid spritz some water in it. Not a lot as you will just need to dip your pencil in it. Think of a old fashion ink well.. 


3rd I selected the beak to color using this step. Just wet and color the part in. Deep color and sooo rich! These pencils are smooth as silk to color with!


4th This part I chose to show you another way I color these stamps. Pick out a couple of colors.. I chose to use the Red and Yellow. I filled from the outside in. Center is where I colored using my yellow and the outside the red.. The water will blend them perfectly for you.. Kinda looks like a rough childs coloring at this part..


5th Use a water brush to smooth and blend the colors together..


6th The next step I used a paper towel and dabbed the center part a bit to tone down the colors and add in a bit more of effect..

Before paper towel..

After paper towel


7th You want to color the black parts too! These are cool shadow areas but they need color too! 


8th Now pull out a white gelly pen and add in a bit of highlights!


Yay he is already to cut out and use in your project! Here is a example of one that I did using a different bird. I also altered him! Only imagination is your limit on these little dandies! :)


Sooo Much fun Using these pencils and stamps!! Thank you for joining me today!!


Wednesday, August 26, 2015

Time Bandit and CE

 Hi all you wonderful folks out there in cyberland! Sharing a project today using yummy CE chippies!! This post is for alllll of you out there that are like me chasing the clock. Yes, sometimes it can be our arch nemesis. LOL Well for me it is! Always trying to get somewhere on time.. Get something done on time.. Always looking at the clock with a grrr LOL.. Working folks understand this, Mothers understand this.. Heck anyone out there that has lots to get done and it just seems that there isn't enough time in the day to do it! Well I have figured out what we are.. We are time bandits! Yep, we take a minute here and there were we can get it. Along with CE and a bit of Tim Holtz I turned that very thought into a tag.   Here is my tag..


 Hehe It just puts a smile on my face! Just love them dog gone Crazy Birds by Tim Holtz! I spotted a uber cool stamp by Creative Embellishments The Distressed numbers stamp! It is cool and funky and perfect! Grabbed on of the 3 inch clock faces and a couple of the numbers out of the Basic Alpha set.. Coloring was easy as pie.. Just got a white paint pen and a black sharpie and colored them. The base of my tag I also used the Distress Screen Stamp. I love that stamp and have used it sooo many times! A total go to in my stash. How about a couple of close ups?!


Notice we are also dancing on a fine thin wire! LOL No detail unnoticed! 


Hope you had a good chuckle and enjoyed today's post as much as I did making it!

Creative Embellishments products used:
Distressed Number stamp
Distressed Screen Stamp
3 inch clock face
Basic Alpha set

Other products used:
Tim Holtz Crazy Bird Stamp set
Prima Clock face and hands
Tim Holtz Distress inks on the BG
Bird colored with Faber Castell watercolor pencils
White paint pen
Black Sharpie
White Gelly pen
Black Gelly pen
Water color paper

Thank you all so much for joining me today! HUGS! :)

Tuesday, August 25, 2015

Back To School with Petaloo

Hi all! Its that time of the year for the kiddos to start back to school! Some are ready for the new school year to begin and some wish that summer would just last forever. With the thought of learning I have a easy tute for ya today! All about coloring those delish Petaloo DIY flowers!! So put on your scrappy clothes and lets play with some paint! :)

Supplies Needed:
Paint- I used 13 Arts and Silks But you can use whatever you like!
DIY flowers- I used for the tute Burlap Blossoms
Water mister
Heat gun

Lets get started!

First I started with some watered down paint. Now you don't want it too runny(like water) but not to dry. Just enough to coat with control. Like the picture shown.

IMG_2009

Now start from the center of the flower and paint out toward the edges. Don't go all the way to the edge.

IMG_2010

Now lets add in some water so the paint bleeds out all the way to the edges..

IMG_2011

IMG_2014
Add in some more paint to deepen the color if desired..
IMG_2015

Dry really good then add in a bit of a deeper tone. For this part I used some Silks.. I didn't cover the whole flower just innermost of the petals..

IMG_2017
All done! You can choose to paint the little centers if you wish. On my project that is how I colored each flower. Easy breezy and fun too! :)

I created a little canvas that you could give to the teacher. Hey nothing wrong with a little gift to get the new year off right!

FullSizeRender (1)

I chose to use all the primary colors. Those are the ones that come to mind for me when I think of school. Here is a close up of those beautiful blooms.. Note the green ones was already colored for me. :) Nothing wrong with pre colored blooms either!!

IMG_2020

Hope you enjoyed and had fun!

Petaloo Products used:
DIY - Burlap Blossoms, Sprigs from the Calla Lily package, Burlap small Sunflowers, Dahlias teastained, Queen Anne Picks
Burlap blossoms in Pistachio
Fancy Trims in Ivory

Other Products Used:
Canvas from the Flying Unicorn August Mixed Art Kit.
Tim Holtz stencil Measured
13 Arts Paint Vivid colors and Black gesso
Silks
Black Chalkboard Paint
Bits from my stash

Thank you so much for joining me today!! Hugs! :)

Summer Memories with Petaloo

Hello everyone in cyber land! I am up on the Petaloo blog today to share a special LO with you. Featuring Petaloo's Gorgeous DIY flowers!

DIY flowers are sooooo MUCH fun to play with!! What makes them so perfect, is you color them to match your project. Have you ever been in a dilemma where you didn't have that perfect shade of flower to go with your project? Well look no more, because Petaloo has that fixed right up for you! They have taken all of their lush blooms from each line and made them so YOU choose what color they need to be!

This Summer has flown by for me personally. Something that has been a tradition for my little family is I take a summer photo shoot with them. It normally is around my kiddo's birthdays and our anniversary. This year I had a special family matter that had to be taken care of, so I missed that chance to do so at that time frame. I know summer is still here right?! LOL For a little while longer anyways. Maybe I will get a chance to squeeze in a photo date with them. For the time being I want to share one that I did of them last year. I have scrapped them before.. But each time I create one I like it better than the last. No waste tho.. I have 2 kiddos and they will not have to fight over them when they get married and have a home of their own. I just hope these memories is as special to them as they are to me! :)

FullSizeRender (2)

Here are a couple of close ups..

You can see the Textured blooms, That I used a little bit of Shimmerz Creamez to color to match the peachy tones in the paper. I mingled in some of the DIY Petites that I colored using Lindy's T-bird Turquoise and some DIY Baby's Breath picks that I used some Shimmerz coloringz Moody mauve. I got to control the color how powerful or how light it would be as you can see below!

IMG_2022

IMG_2023

Lots of Petaloo yumminess mingled in there! Lace and embellies Mmmmm! Lots of fun to create this LO with a dash of love too! :)

Petaloo Products used:
DIY-Textured, Petites, Baby's Breath
Fancy trims - Lace
Daisy Resin Heart

Other Products Used:
Flying Unicorn August KOM featuring Kaisercraft
Tim Holtz Distress inks
Creative Embellishment distressed harlequin stamp
Melissa Francis resin frames and banner
Martha Stewart lace punch
Bits and pieces from my scrappy desk!

Till next time Hugs all! :)

Monday, August 3, 2015

Mojo Monday with Flying Unicorn

Hello all you scrappy folks out there! Had a fun time playing along with Alda's sketch this week. Here is the gorgeous sketch..


I used the August KOM to create my LO. Clean and simple LO sometimes its good to just play a little to showcase a photo. I altered the white lettering on the paper to make it pop forward and stand out against the white doodling. I also used the Prima stencil that was in the Mixed Art August KOM to enhance the  corners of the LO. Super fun and sweet page! Here are a couple of close ups of this LO.


Hope you dig into that stash and play along with us this week. Its always fun to play along with Flying Unicorn sketches!