Friday, October 30, 2015

Flying Unicorn Your Passion Your Art KOM November!


http://www.flyingunicornstore.com


The word "cornucopia" is a perfect word to describe the November kit from the Flying Unicorn.
cor·nu·co·pi·a - noun
a symbol of plenty; an ornamental container shaped like a goat's horn; an abundant supply of good things of a specified kind
synonyms :an abundance, a plentifulness, a copiousness, lavishness, a bounty

While November's kit is not shaped like a goat's horn, it is more than abundantly filled with wonderful coordinated products. Without further adieu we offer you our November - Your Passion. Your Art kit of the Month


http://www.flyingunicornstore.com/category_s/1587.htm

http://www.flyingunicornstore.com/category_s/1522.htm
November's bounty comes with a perfectly selected "off the page" project. Included in each Main Kit, is always a fun and unique "off the Page " item. This darling wheel barrow is perfect for the season. This unique item is chosen just for November, and just for you.


http://www.flyingunicornstore.com


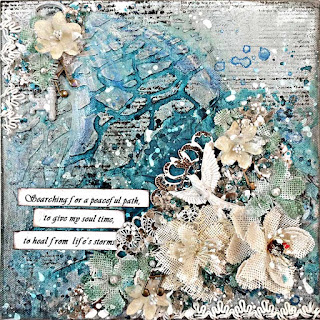
From the beginner to the avid mixed media artist our Mixed Art add on kit will surely please you. Our Mixed Art kit will always come with a canvas and mixed media art supplies to advance your skills as an artist.




http://www.flyingunicornstore.com/category_s/1587.htm
http://www.flyingunicornstore.com/category_s/1522.htm
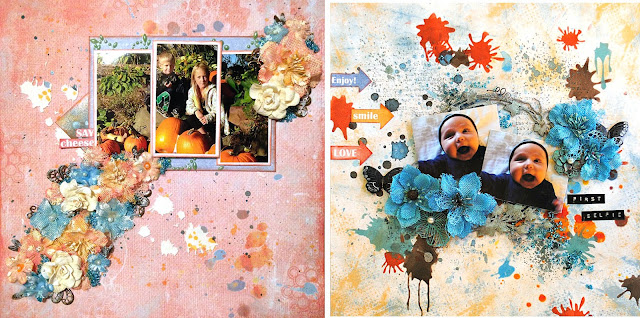
Flowers, vines,and embellishments oh my! Our Mixed Passion is a collection of everything pretty to add to the Main kit or the add on kits. The colors and embellishments will enhance your Kit of the Month creations or it can stand alone and you can create something magical on its own! So turn up the music, make some tea and lock your self away while you create some art!




http://www.flyingunicornstore.com/category_s/1587.htm


http://www.flyingunicornstore.com
Our Small Art Big Passion is all about the love of making cards, tags atc's and anything in between. From Stamps, flowers, paper, embellishments and pretty things in between! These yummy goodies will enhance any of the kits or stand alone .


http://www.flyingunicornstore.com


We are thrilled to present great free tutorials, techniques, videos and Build a Page using our Kit of the Month to help you grow in the passion of your art. So stay tuned there is so much more to come in the next week!


Thursday, October 29, 2015

Having a Hoot with Petaloo and Authentique!

Hi Petaloo fans! Here to share a cute little card with you today. Using the yummy Authentique "Nestled" collection and Gorgeous Petaloo blooms!

When we recieved this paper with our design team box of yumminess, I seen a sheet in it that reminded me of owl eyes (observant sheet). I thought it would be a "hoot" to make one too, so I did! LOL Here is my card its a size A7..
FullSizeRender (7)

 I think I used just about every sheet in some way from this collection. Either on my card or piecing together my owl. Mostly made using different punch shapes. The body I free handed on a piece of white cardstock. Very easy to do too. Just fold your paper in half and draw out your shape. That way your little ears matchup. The beak is also done by folding a piece when folded it was about a inch size square. Then I turned it on the angle a wha la a beak! The wings are actually left over pieces that was cut out and they worked perfectly as wings. The rest is just circle punches I had on hand of different sizes and a heart shape punch for the feet. Love adding in dimension to things. This was no different. I used foam and cardboard to layer everything together. So my owl wouldn't be flat, but blend nicely with my gorgeous Petaloo flowers that I used. How about some close ups?

FullSizeRender (8)

I used some of my fave Petaloo blooms! I used a Sugared Big bloom in Mocha, Mixed Textured Mini blossoms, and a Spring Berry cluster (to fashion a branch for my little owl). Here is another close up..

FullSizeRender (6)
Loads of fall fun playing with Authentiques "Nestled" collection and Petaloo blooms! They go hand in hand and match so perfectly together!
Petaloo Products:
Botanica Sugared Bloom
Textured minis blooms in Teal
Spring Berry Pick
Other Products Used:
Authentique "Nestled" collection 

Thank you so much for joining me today!!

Monday, October 19, 2015

Spooky Cell Phone Cover with CE

Hello CE peeps! Here today to share a spooky fun project with you! Inspired by Finnabair's work I made a cell phone cover using yummy CE chippies. Lots of fun making this spooky little piece.


Ton's of chippy fun in this little piece. My first layer is the Small steampunk pipe corner that I modified a bit to fit. It was coated with black gesso and some gel medium. Then coated again with black gesso. That is the base of the whole piece. I used Small gears to help the project link together.  I also added in a cool chippy Propeller at the top of the piece for more cool layers. All of these pieces are covered with black gesso. For the centerpiece I used both sizes of the Steampunk skulls to give more depth to the piece as a whole. I also used both black and white gesso on this piece.  Adding in adornments and micro small metal gears for the finishing touch and a tiny bit of black lace in there too. For the coloring I used Silks in green, blue and gold tones. I created the star on the heart with white gesso. I'm giving this as a gift to a friend who happens to love skulls and green. How about a couple of close ups?


Detail rich with womanly things to accent with. Just love how these skulls look all decked out with some Flying Unicorn Adornments!


Lots of fun taking a plain ole black cell phone cover and making it a working piece of art!

CE products used:
Steampunk Skulls
Propellers
Small gears
Steampunk pipe corner piece

Other Items Used:
Flying Unicorn Adornments
Silks
Black Gesso
White Gesso
Gel Medium
Little bit of bling

Sunday, October 18, 2015

Mist Review on my 3 Fave companies Shimmerz, Lindy's and 13 Arts

Mist Review
By Tammy

Hello Everyone! I have been ask by a few folks about mists. What to choose or start out with and so on. Well That is kinda hard for me to choose as I love allllll mists!! I do have 3 different company's I play with a lot so thought I would give a review of what I like about them. I use all 3 in the different mixed media projects that I do and love what each have to provide. 

The 3 that I am giving a review over are Shimmerz, Lindy's and 13 Arts.

These are in no certain order either.. As I said I love them all! They each have their own spot as my go tos as well! I tried to stay mostly within the same color pallet with all 3. Yellows, Blues and Green. 5 or 6 colors a piece for each company. (what I had in those 3 colors basically) All of my backgrounds have been treated with gesso 1st.

Shimmerz

Sample Piece


Close up of my sample:


This is totally my feel on these mists. They very translucent even the darker colors. Which makes them perfect to work with if you are a heavy handed person, as I can sometimes be. I am not scared of overuse with them. They have none shimmery colors as well as shimmery. They blend very well with one another too. I have used them alongside other mist company's and never have been disappointed. I used no water with the blending on this sample. Just a wet paintbrush here an there. It wasn't extremely wet brush either. I didn't need it to be. I find these mist to be really forgiving mist to work with. 

Lindy's

Sample Piece


Close up of sample piece:


My thoughts on these mists. One of the very first mists that I have ever owned. I have many colors in these mist too. Pigments are nice, you can tame them down with water. The shimmer quality is deep with these mists. But also you can get colors without the shimmer. Blend well with other colors as well with other companies. Nice rich and vibrant colors. My most fave thing with this company is the shimmer quality and the Moonshadows. The Moonshadows have kinda a sepia tone with color. I love the Moonshadows lots! No water was used other than a wet paint brush for blending same as Shimmerz.

13 Arts

Sample piece


Close up of sample


My thoughts on these. Pigment RICH! I had to actually mist some water here. Power house on pigments. They blend very well too. The pearl has a nice shimmer. The chalks have no shimmer. If I need a pigment heavy mist these are my go to mist. They are almost, and I say almost paint like mist. I have to be aware of not overloading my piece with color, but sooo love the vibrant rich colors that these mists have. 

Clogging, I haven't had a single brand that has crossed my path that hasn't clogged on a bottle. It is very easy to fix. Just pull the tube out and clean the nozzles good. For the most part this works. Always shake really good as well the mica and pigments settle after they haven't been used for a while. Don't forget you can use a paintbrush and paint on the color as well. You will have more control over where your color goes. You will get nice results either way. 

Hope you found my reviews helpful in someway. Have a great day!


Saturday, October 17, 2015

Story Go Round With Petaloo and G45

Hello all of you wonderful Petaloo fans out there in cyberland! Here today to share a project with you made with gorgeous Petaloo blooms!
I have seen Gorgeous Merry Go Rounds on Pinterest and I have wanted to make one for a long time. I had some G45 "An Eerie Tale" papers on hand and of course they match Petaloo Flowers perfectly! So here was my chance to build said project! I made my own pattern. Mostly using empty ribbon rounds layered with larger circles to cover them and allow me to attach everything together. The center part is a empty toilet paper roll. Nice to recycle trash and create treasure! I made a "story go round". Kinda felt the play of the papers and intertwined them with the project. Here is My Project..

Here is the Front.. A little Witch on top to watch the children play below! Ooo But I think they spotted her and running round and round they go!
IMG_2211

Back of Project... Gorgeous Petaloo Botanica Chantilly Velvet Hydrangeas in Violet and Mixed Blooms in Sienna adorn my piece. Such a perfect match!
IMG_2218

How about a couple of close ups? Ooo do you see the witches winged friend trying to catch the little girl?! She is faster than he! Only happy endings in this little story!!
IMG_2216

One more close up. This is of the maiden who has the magic to turn all evil to gorgeous blooms! :)
IMG_2217
A total FUN Halloween Project! Thank you for joining me today and letting me share my project with you!! Hope you have a creative and FUN Halloween!!

Petaloo Products Used:
Botanica Chantilly Hydrangeas and Mixed Blooms
Other Products Used:
G45 "An Eerie Tale" Collection

Thursday, October 1, 2015

Flying Unicorn OTP Oct KOM

Hi all!! Sharing my OTP from the Main Oct KOM Flying Unicorn. Super fun project! I actually painted mine with IZINKs. It was really fun gussying it all up with flowers from Petaloo too! Here is the outcome...


I gave it to my MIL who is using it as a center piece to her coffee table. Rustic and full in season! Here are a couple of close ups..


The Green Leaves are made out of Burlap. I cut them with a leaf die covering them first with Gel Medium so they wouldn't fall apart. I also Painted and applied micro beads for just a little bit of added texture. The Multi colored leaves I die cutted them out of cardstock and then added some distress inks sealed the distress inks in with some micro glaze. Thank you for joining me today!

Items Used:
Oct KOM OTP
Petaloo Burlap flowers
IZINKs
Tim Holtz distress inks
13 Arts Mist (KOM)
13 Arts Old Gold Paint (KOM)
13 Arts Micro Beads

Creative Embellishments Oct Challenge! Spooky FUN!!

Hi all!! I just adore this month's challenge inspo pic!!! Creepy and cool all the same!! Perfect for this spooky month!!


I love the BG I used the pumpkin that skeleton man is holding. I used it as my main piece on my creepy canvas.


 Easy to color the Pumpkin face too! Just cover with gesso and then color with Faber Castell big brush pen. Then stamp with the Distressed Grid stamp in random areas, back with some yellow paper. The Halloween  Fence set and Creepy Tree was covered with a big brush pen too. The tree was kissed here and there with some 13 Arts old gold metallic paint. I also used a couple of other bg stamps from CE to give more texture and spooky feel to my backgrounds. The tag I have used the Distress Screen and then the main BG the Distress Script stamp. How about a couple of close ups?!


Coool and spoooky chippie Pumpkin face!! 


Hehe I just had to put a owl in the tree peeking out, looks like he's spooked huh?! The medal clock was used to let the onlookers know the time is almost here to be spooked too! Also the twist piece of the challenge!

CE products Used:

Other products Used:
CTMH Halloween stamps
Jute

 Hope to see the inspo rolling in for this months challenge!! Was a blast to make and CE has TONS of Cool and spooky chippies to play with!!