Supplies needed:
2inch circle punch (note mine is a scallop punch that I trimmed off the edges of the scallop), 1 1/4 circle punch, 7/8 sun punch, White or iridescent mist, Ink color of your choice, White and brown CS, Shaping tool, stick, tweezers, scissors, spongy mat, glue quick drying.
Step 1. Petals and Base:
You will need to punch 6 Large circles, 4 small circles. Set one large one aside for base.
Cut all petals as picture shown. Basically notching top and each lower side of the circle.
Step 2. Coloring Petals:
Color all with ink of choice on top part edges front and back. Pounce same color on bottom of each petal like shown. Then mist with the white or iridescent mist.
Step 3. Shaping:
Shape petals as shown in below pics. Using a stick rolling top edges back and then take tweezers grasp in center then pinch sides slightly inward to finish petal shape. Petals need to be slightly damp.
Step 4. Gluing petals:
Take 5 large petals to base. Like the pictures shown below. Glue down slightly over lapping the next one as you go.
Step 5. Gluing down center petals:
Glue down 4 smaller petals like shown in picture below. Make sure to kinda bend down at the end of the petal to make it stand up. Not a complete bend, just a slight one. I always put a puddle of glue in the center to start this process. Again slightly over lapping them. After you have them arranged let dry and make centers.
Step 6. Centers:
Punch 3 sun shapes and litely mist with same iridescent color. 1st sun shape on mat with tool. Rolling in center with a circle motion. Your center should rise. Next 2 sun shapes cut in the center of rays one sun shape little more than the other. Being very careful not to go all the way through. then shape like the first one rolling in the center in a circle motion. you should see them standing up the deeper the cut the more tighter it will go together. On the last one gently pinch it in a little tighter. Now glue pieces inside the other. Should look like last pic when done.
Step 7. Attaching center and final result:
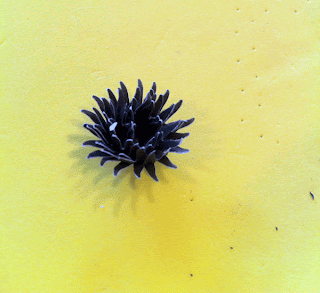
Glue center in the middle of your bloom and your done! Here is what it looks like when completed.
Hope you enjoy and share your results with us in the Flower Fantasy thread for a chance to win a fabby Rak!


Lovely!!
ReplyDelete