

What you will need..
6 flower die or punch would work too! 2 sizes tiny and small. Not sure on the exact sizes..
Petal shaping tools
glue
Brown cardstock
Shish kabob sticks (bamboo skewers)
Something to cut the skewers with
Tweezers or quilling tool
First one we are gonna make..

Cut 5 small and 4 tiny flowers and cut 1 petal off one and 2 off another. Should look like this..

Now get your petal shaping tools and roll with a circle motion with the big end of the tool, in the center of each of the small flowers. Then one the reverse side each petal.. The ones with the sections that have been removed roll till it looks like the ends could meet. Here are pics of these steps..


Glue the ones with missing sections so the meet. Let dry..

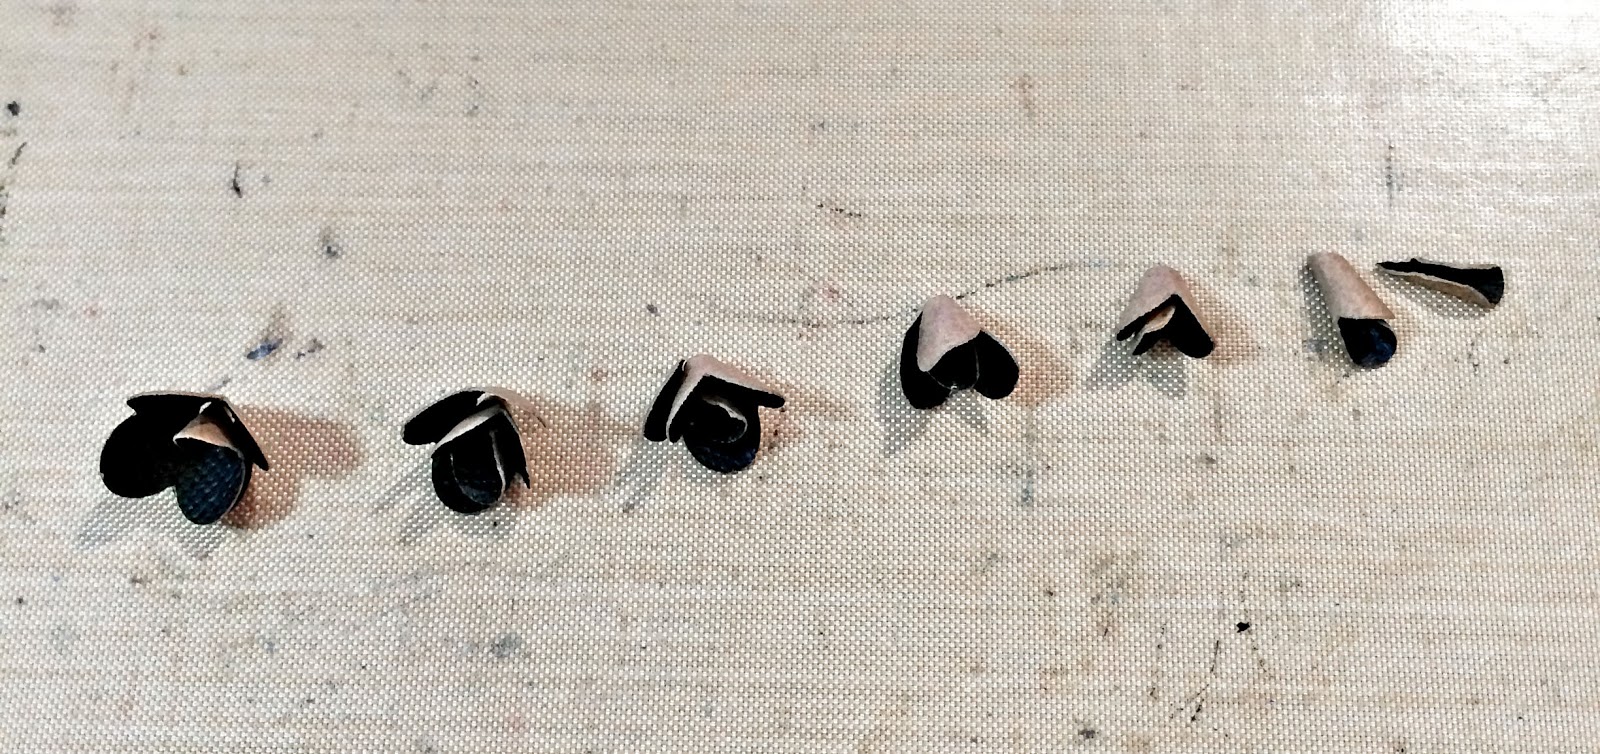
Get your tiny flowers and do the same as mentioned above with the exception using a smaller head on the end of the tool and graduate your pressure on them you want them stackable, but gradually getting more closed. you may need to pinch your last 2 flowers to get them tighter.. Here are the pictures of this step and final results of the shaped pieces..


Now glue and stack alternating so that you see a petal in the "v" section of the one you place on top of each layer.. Here is what this process looks like..


Next one is very similar to the above with the exception you won't need the tiny flowers.. It will look like this when done.. Ignore the pic of the one we just made. LOL Thought I had a pic of it solo.

Now punch or die cut 5 of the small flowers. Then punch a hole in the center of each. Then remove 1 petal out of one, then 2 out of another one, then cut one in half. The 2 you have left just cut a slit to your punched hole between 2 of the petals. Yours should look like the below pic..

Now get the discarded pieces from the 1st flower (single and Double petal) and roll them with a quilling tool or tweezers. Then roll the larger pieces pictured above. They should look like the pictures below..


Now stack on the skewer from large to small gluing and rotating as you go.. I applied glue to the inside where the hole was as I slid each piece into place it helped with the glue on the next piece. You may want to do a dry run before gluing so you can mark on the skewer how far down you wanna go and mark it with a pencil. The very tip end of it you will glue your single piece to hide your skewer. Also make sure your alternating so that each empty space you see a flower petal. Here is pics of this process..


Here is a tag that I made with the above pinecone...


Products used to make Tag,
CTMH stamp (title)
Gesso
Thank you for Joining me today!
No comments:
Post a Comment